Ragù

Ragù


Hello, it’s been a while. Rest assured I’ve been cooking and have plenty to share with you, but somehow I have not got around to doing it yet. EE573656-7F71-4B7F-9A1D-F427DB65EDE4My youngest son has got me into sourdough baking, which I am enjoying far more than I ever expected. It’s challenging though and while my loaves are improving, I’m not ready to write about it yet.

Today I want to tell you about ragù: I’ve been experimenting a little with it lately. Ragù simply means meat sauce and I suspect in Italy it’s one of those dishes for which there are as many recipes as there are cooks. Here we tend to call it “bolognese sauce”, “spaghetti bolognese” being one of this country’s most popular dishes, despite the fact that in Bologna they always serve their ragù with tagliatelle and never spaghetti.

I’m sure you all have your favourite ragù/bolognese recipe. I wrote about mine here, as it’s used to make Tamasin Day-Lewis’s lasagne, but recently I’ve made some adjustments to it to make it work better in the Aga. I felt the finished sauce contained a little too much liquid; one of the best Aga tips I’ve been given is to use less liquid than a recipe prescribes because in an Aga there’s no evaporation. It’s why Aga dishes are always so deliciously succulent and moist. The result of my tweaks is a thicker sauce and I’m very pleased with it. I’ve also been making another ragù recipe which my eldest son recommended to me; it’s incredibly simple and delicious and comes from The Silver Spoon, the English edition of the bestselling Italian cookbook, Il Cucchiaio D’Argento. I own the Italian version, a Christmas present from my sons, but for some reason it doesn’t contain this specific recipe. You will see that the addition of garlic to this recipe is optional. I used to think garlic was essential to ragù but it turns out Italians often don’t add it. I urge you to try this recipe without; I was surprised at how flavourful it was. The wine is also optional but I confess I have only ever made this version with wine.

I have only used minced beef in these two recipes but you can use half beef/half pork or veal. Ragù is also delicious with the addition of a little crumbled up Italian sausage. It must be a proper Italian one though, for reasons of both flavour and texture.

Anyway, here are the two ragù recipes for you, with quantities adjusted to make them work well in the Aga.

Mum’s Ragù 

(Sorry, not sure how many people this large quantity will serve, but I’d say at least 10)

Ingredients

  • 1 kg minced beef (not extra lean: you need the fat for flavour)
  • 2 onions, chopped
  • 3 carrots, diced
  • 2 sticks celery, chopped
  • 3-4 cloves garlic, crushed
  • 3 tbs olive oil
  • 25g butter
  • 2 bay leaves
  • 1 tbsp tomato purée
  • 100ml milk
  • 100ml white wine
  • 200ml passata
  • Seasoning

Method

  • Take a large casserole or saucepan and heat the oil and butter in it on the simmering plate
  • Add the onions and stir until coated in the oil and butter
  • Cover and place in the simmering oven for 10 minutes or so before stirring in the carrots and celery and returning to the simmering oven until all the vegetables (the soffritto) are soft
  • Place the pan on the boiling plate, stir in the crushed garlic and add the mince and some salt and pepper
  • Stir it in while breaking it up with your wooden spoon. You could also use a fork
  • Once the meat is brown all over move the pan to the simmering plate
  • Add the tomato purée, bay leaves and milk and simmer for about 5 minutes before adding the wine
  • After another 5 minutes of simmering, stir in the passata, cover and place in the simmering oven and cook for a minimum of 3 hours. You can always add a little water if it looks dry but it probably won’t. I sometimes uncover it for an hour or so towards the end
  • Serve with tagliatelle (or spaghetti as in my photo above), which has been tossed with the ragù in the pan, and lots of grated parmesan

Son’s Ragù

(serves 4)

Ingredients

  • 2 tbsps olive oil
  • 40g butter
  • 1 onion, finely chopped
  • 1 celery stick, diced
  • 1 carrot, diced
  • 1 clove garlic, crushed (optional)
  • 250g minced beef
  • 1 tbsp concentrated tomato purée
  • 120ml dry white wine (optional)

Method

  • Gently heat the butter and olive oil in a heavy based saucepan on the simmering plate and add the onion. Cover and cook in the simmering oven for 10-15 minutes until translucent
  • Add the carrot and celery and cover and cook for a further 20 minutes or until all the vegetables are soft
  • Stir in the crushed garlic, if using, and then add the steak, with your pan on the boiling plate, breaking it up with a wooden spoon and perhaps a fork too
  • Cook for a few minutes until all the pinkness of the meat has gone
  • Remove to the simmering plate and stir in the tomato purée
  • Stir in the wine, if using. If not, stir in the equivalent quantity (120ml) of water
  • Season with salt and pepper and bring it up to the boil and if it’s looking dry add some more water: perhaps another 100ml
  • Cover and transfer to the simmering oven and cook for  a minimum of three hours, adding more water if you think it needs it. This also applies if you added wine initially
  • Serve as above


Chicken Marbella

Chicken Marbella

Many years ago my sister-in-law gave me The Silver Palate Cookbook for my birthday. It was written by two American women who had opened a shop in New York selling various foodstuffs and gourmet take-away dishes which they prepared themselves. The shop was a huge success as was this book of its recipes, which gave the owner the sense they were cooking restaurant food in their own homes, but without too much hassle. It felt cool to own this book.

When my children were young I used the book mainly for its baking recipes. There was a period when almost weekly I made the chocolate chip cookies as an after school treat for my sons and their friends. I still make the glazed lemon cake, at his request, for my eldest son’s birthday (he’s 31!)

I don’t think I’m unusual in that I sometimes forget about the cookbooks I own. It doesn’t mean I no longer like them and nor do I ever get rid of books (I’m looking at you, Marie Kondo). fullsizeoutput_319b I love returning to old favourites and it only takes a newspaper food column or blog post to jog my memory and renew my fondness for a book or recipe.

Which is exactly what happened a couple of weeks ago when Debora Robertson wrote a post on her website entitled “You should make Chicken Marbella, you know” and I was prompted to get my Silver Palate book out again. The recipe in the book uses four small chickens (weighing 2 1/2  lbs each), quartered, giving 16 sixteen pieces. This was too much for my purposes (a small family supper) so I scaled down. I could have jointed a chicken but decided to use eight free-range chicken thighs (skin on, bone in) instead. This is what I did:

Chicken Marbella

(This dish involves marinating so start it several hours ahead or even better: the night before)

Ingredients

  • 8 chicken thighs, bone in, skin on
  • 4 garlic cloves, peeled and crushed
  • 2 tsps dried oregano
  • Salt and pepper to taste
  • 4-5 tbsps red wine vinegar
  • 4-5 tbsps olive oil
  • 10-12 pitted prunes
  • 16 pitted green olives
  • 2 tbsps capers with a bit of juice
  • 3 bay leaves
  • 2 tbsps brown sugar
  • 100ml white wine
  • 2 tbsps (approx) chopped flatleaf parsley

Method

  • In a large bowl or dish combine the chicken thighs, garlic, oregano, seasoning, vinegar, oil, prunes, olives, capers and juice and bay leaves. Cover and leave to marinate in the fridge for a few hours or overnight
  • To bring it up to room temperature, take the chicken out of the fridge about an hour before you want to cook it
  • Arrange the chicken and other ingredients in the small Aga roasting tin (or any tin measuring approx 32 x 21 cms) spooning the marinade around and over the chicken
  • Sprinkle over the sugar and pour in the white wine
  • Bake in the roasting oven for about 45 minutes. Or, if you have time, start it off in there for 15-20 minutes and then move to the simmering oven to finishing cooking slowly, allowing the chicken to become supremely tender and sticky and the flavours to develop, until you’re ready to eat
  • Sprinkle with the chopped parsley to serve

We ate ours with wholegrain basmati rice and green beans. Broccoli or a green salad would also go well.


Jerusalem Artichokes with Fennel and Peas

Jerusalem Artichokes with Fennel and Peas

Having consumed during the Christmas period one massive turkey, a Norwegian spiced pork belly, a baked ham and a venison casserole, we are craving vegetables in this house. Sprouts, red cabbage, salads and lots of fruit also featured heavily on the menu but meat predominated. I’m not saying we’re going in for Veganuaray or any other New Year trend; it’s about needing to reset our dietary priorities. This month I’m going to cook without meat during the week but we’ll continue to have a roast or other meat dish on Sundays.

With this in mind I was delighted to pore over one of my Christmas presents from my sons: Joe Trivelli’s book, The Modern Italian Cook. I confess I was not familiar with Trivelli, who is head chef of the River Café, but I am glad to have been introduced. And Diana Henry, whose recipes you know I love, gave it a mention in her Telegraph column. If that’s not a recommendation, I don’t know what is.

It’s a beautiful book and I want to make everything in it but so far I’ve only got as far as making one of the dishes twice, first as a starter on New Year’s Eve and then last night we had it as our main meal with some fresh bread to mop up the juices. The recipe works well in the Aga.

Jerusalem artichokes with fennel and peas

Serves 4 (or 6 as a starter)

Ingredients

  • 500g Jerusalem artichokes
  • 2 fennel bulbs, trimmed
  • ½ large or 1 small red onion, sliced
  • 2 garlic cloves, crushed
  • 500g frozen peas
  • 10 mint leaves
  • 2 parsley sprigs or a handful of chopped parsley
  • 1 lemon
  • Sea salt, black pepper and extra virgin olive oil

Method

  • Peel the artichokes and cut into wedges. Keep under water to stop them discolouring.
  • Remove any stringy-looking outer parts of the fennel and cut into thin wedges. Toss in some lemon juice to prevent them discolouring
  • Heat a tablespoon of oil in a heavy-based, wide pan with a lid and sweat the onion with a pinch of salt. You could place the pan in the simmering oven at this point
  • Once the onion is soft add the garlic and a minute or two later the fennel. Stew with the lid on for five minutes (or longer if you put it in the simmering oven)
  • Add the Jerusalem artichokes, peas and some black pepper and continue to stew. Trivelli says to do this for 10 minutes over a low heat but my artichokes needed a lot longer than this (in the simmering oven) before they were soft. In fact, to try to speed things up I put the pan in the baking oven for a while. And Trivelli is right to say that Jerusalem artichokes cook unevenly: I found that when some wedges were soft and tender, others were still hard. But your patience will be rewarded, I promise you
  • Once your artichokes are cooked, check the seasoning, add your herbs and stir them through with some extra virgin olive oil
  • Serve with wedges of lemon to squeeze over


Christmas Recipes: Norwegian Spiced Pork Belly

Christmas Recipes: Norwegian Spiced Pork Belly

For me Christmas is not the time for trying out new recipes so our Christmas Eve and Christmas Day meals don’t change much from year to year. When I was growing up (in England) with my Norwegian mother and English father we celebrated Christmas the Norwegian way on Christmas Eve and the English way on Christmas Day. This meant my brother and I could open our presents on Christmas Eve and our friends were rather jealous. The evening would begin with dinner and then we’d sit round the Christmas tree for the present opening. I’ve never opened presents on Christmas Day so I don’t know what it’s like but I can tell you there is something magical about doing it by candlelight when it’s dark outside.

When I married my husband I was fully expecting to leave the Norwegian Christmas Eve behind but he loved this way of doing it with all the cosiness and candles and insisted we kept the tradition going. I’m so glad we did because our children have always loved it, partly because it makes their Christmas a little bit different from their friends’. 

Christmas Eve: Herrings

Our Christmas Eve meal always starts with Norwegian pickled herrings. We buy them from the Christmas Bazaar held every November in the The Norwegian Seamen’s Church in Rotherhithe, London. When she was younger, my mother used to spend a couple of days with friends in London helping to prepare these for sale at the bazaar. She doesn’t do that anymore so my sons have accepted the mission of going along on the Saturday of the bazaar and purchasing a few jars of this most delicious food. I haven’t managed to join them yet but intend to go along one year, if only for the waffles, cake and coffee on offer inside the church! We eat the herrings on rye bread accompanied by ice cold Linie Aquavit straight from the freezer and cold lager. So delicious.

Christmas Eve: Spiced Pork Belly

There is more than one traditional Christmas Eve meal in Norway. On the West coast they have cod cooked in a special way.  It is bought very fresh, cut into steaks, put in salted water overnight to tighten the flesh and then poached. It is served with melted butter and lots of chopped parsley and plain boiled carrots and potatoes. Perhaps surprisingly, Norwegians always drink red wine and not white with this dish. My mother’s family always had reindeer for their Christmas Eve meal but spiced pork belly, popular as a Christmas dish on the south coast of Norway where my grandfather was from, would also form part of their festive fare. We have made pork belly our traditional Hardy family Christmas Eve dish. I make it according to my grandmother’s recipe, passed to me by my mother, who has given me permission to share it with you here.

You will need:

  • Pork belly (you decide how much, depending on how many people you are feeding, but remember, it tastes just as good cold so any leftovers will not go to waste) with the skin removed (I get my butcher to do this) but the fat – very important this – left on
  • Ground ginger, salt, mustard powder and white pepper. I’m not giving you quantities except to say: be generous

Method

  • The day before you want to serve the belly score the layer of fat with a sharp knife and rub lots of white pepper, ground ginger, mustard powder and salt into it on both sides and wrap it in clingfilm IMG_4150
  • Place it in the fridge fat side down for at least 24 hours
  • On Christmas Eve in the morning take the belly out of the fridge and let it come up to room temperature
  • Sprinkle on some more salt
  • Choose a roasting tin (I always use the large Aga roasting tin because I tend to cook a whole belly), remove the clingfilm and place the meat in the tin, fat side down
  • Add about a cupful of water and cover with foil
  • Hang the tin on the second or third set of runners of the roasting oven, taking care that the foil doesn’t tear as you slide it in
  • After twenty minutes take it out, remove the foil, turn the pork over and add a little more water if it looks dry
  • Slide the tin onto the floor of the simmering oven and leave it there for the rest of the day, checking the water level every now and then. It will be cooked and delicious after five hours but even better and falling off the bone after eight or nine

I serve it with spiced red cabbage and roast potatoes, having made a divinely spicy and gingery gravy by adding some wine and sour cream to the meat juices.

For pudding we usually have this Norwegian apple cake which my mother makes for us according to my grandmother’s recipe.  


Sunday Lunch: Roast Chicken and Apple Crumble

Sunday Lunch: Roast Chicken and Apple Crumble

I could be wrong but I get the impression fewer people are doing a roast on Sundays these days. Some of my emptynester friends say they only bother when their offspring return home or if they have guests. Even after my youngest went off to university last year I continued to cook a Sunday roast, partly because it’s the one occasion each week when we haul my frail and elderly mother-in-law upstairs from her flat below to join us and partly because, well, it’s delicious. My children tell me they’ve always enjoyed the weekly ritual and this pleases me because it means it’s worth the (not necessarily huge) effort. When I was pottering about in my kitchen, one recent Sunday morning, it struck me that one doesn’t have to spend very long preparing the roast and that simple does not have to mean dull. And of course if you are too busy during the day pursuing the leisure activity of your choice, you and your family can have this meal in the evening rather than try to fit it in at lunchtime.

So this post is about proving that it needn’t be hugely time-consuming or arduous and outlining how I made roast chicken and apple crumble in two hours flat. It is also to show you that not all Aga cooking is long and slow, which is not to say that slow roasting isn’t an excellent way of making the most of an Aga: you can put your joint of meat in the simmering oven before bed on Saturday night or bright and early on Sunday morning and have meltingly tender meat for lunch or supper on Sunday. I did this recently with a pork belly and it was one of the best roasts we’ve ever had.

On this particular Sunday I took the bird out of the fridge about an hour before I wanted to cook it, to let it come up to room temperature, and then, having popped out to buy the Sunday papers, I started on the lunch preparation. I roasted the potatoes around the chicken. They absorbed the buttery garlicky juices and the flavour and texture were superb. I love them done this way (and it saves time and washing-up) but they were not crisp. If you want crisp, you’ll have to par-boil them for 5 minutes and then roast them in very hot duck or goose fat in a tin on the floor of the roasting oven for about thirty minutes.

Roast Chicken

Ingredients

  • 1 whole free-range chicken weighing about 1.5kg
  • Unsalted butter
  • Several (quantity up to you but a minimum of 8) garlic cloves, unpeeled
  • About 8 bay leaves
  • A sprinkling, ie to taste, of Lakeland Herb Sea Salt
  • Potatoes: one or two per person, peeled and chopped into large chunks. I used these red potatoes on this occasion but any variety will do. In the summer I use new potatoes: just halve the larger ones and there’s no need to peel them

Method

  • Place your chicken in a roasting tin with enough room around it for the potatoes
  • Spread butter generously all over the bird and sprinkle with the herb sea salt or if you don’t have any, just salt and pepper
  • Place one garlic clove and one bay leaf in the cavity
  • Slide the tin onto the second rung of the roasting oven and leave it there for 20 minutes before removing it, basting it with the buttery juices and placing the potatoes and remaining garlic cloves and bay leaves around it, turning them to coat them in the butter too
  • Return the tin to the roasting oven, this time on the fourth rung, for about an hour. Half way through, turn the potatoes and give the chicken another baste
  • The chicken is done when a thigh is pierced with a sharp knife and the juices run clear
  • Remove the bird to a large plate or board, keeping it near the Aga and maybe covering it with a clean tea-towel. Discard the garlic and bay leaves and place the potatoes in a serving dish in the simmering oven to keep warm while you make some gravy
  • All I do for this is deglaze the roasting tin with some white wine on the simmering plate and then pour all of this through a sieve into a small pan to bubble away for a few minutes, adding more wine or some stock and whatever else you fancy: for example, you could whisk in a little crème fraîche. Decant this into a small jug and keep it warm on the back of the Aga while you get everyone to the table and find someone to carve your bird
  • I will leave the choice of accompanying vegetables to you but the other day I served ours with steamed Savoy cabbage tossed with a little butter and lots of black pepper added

Apple Crumble

(Serves 4-6)

You can be making this while the chicken is roasting. This is the basic recipe; feel free to add cinnamon and/or some raisins to the apples; or reduce the amount of apple by 25 per cent and replace with blackberries when in season.

Ingredients

  • 4-5 cooking apples
  • 110g/4oz unsalted butter
  • 110g/4oz plain flour
  • 110g/4oz ground almonds
  • 110g/4oz golden caster sugar plus an extra heaped tablespoon
  • A heaped dessert spoon of demerara

Method

  • First make the crumble by placing the butter, flour, almonds and sugar in a large bowl and using your fingertips to rub the butter into the dry ingredients until the mixture resembles breadcrumbs. You can of course do this in a food processor
  • Peel and slice the apples, putting the slices straight into the dish you want to bake the crumble in. Add some lemon juice to stop the apples from turning brown
  • Sprinkle the crumble mixture on top, smooth it over and then press it down with the back of a spoon
  • To finish, run a fork lightly over the surface and sprinkle over the demerara
  • Bake in the baking oven, with the rack on the fourth rung, for about half an hour until golden brown on top and the apples feel soft when a knife is inserted into them

Braised Pork with Ginger and Star Anise

Braised Pork with Ginger and Star Anise

My sons gave me two cookery books for my birthday. My daugher-in-law looked a bit sceptical and asked if I was sure they were what I wanted (I do have quite a few already), but I assured her it was. I had dropped a few (many) hints in the run-up to my birthday. One of the books was Diana Henry’s new one, How to Eat a Peach, which is a beautiful 71ztiybGwmLcollection of menus rather than recipes; it’s also a sort of memoir, an account of the places she’s travelled to since she was a teenager, and where she discovered all the dishes she loves to cook and eat. I have already cooked a few of the recipes from the book, although I haven’t yet put together a whole menu. The first thing I made was this braised pork, which I pounced on because I knew it would be perfect for the AGA simmering oven. I adjusted the quantities because there were only four of us eating and off I went.


Braised Pork with Ginger and Star Anise

Serves 4

Ingredients

For the pork

  • About 1tbsp groundnut or vegetable oil
  • 1kg pork shoulder, cut into 3cm cubes
  • 200g shallots, sliced
  • 20g fresh root ginger, peeled and finely grated
  • 5 garlic cloves, finely grated or crushed
  • 5 tbsps kecap manis
  • 3 tbsps light soy sauce
  • 11/2 tbsps tamarind paste
  • 400ml chicken stock
  • 1 star anise
  • 2 medium-hot chillies, halved, deseeded and finely chopped
  • 2 birds’ eye chillies, left whole

For the crispy fried shallots

  • Groundnut or vegetable oil
  • 100g shallots, finely sliced
  • Sea salt flakes

Method

  • Spread the pork out on a large baking tray, lined with bake-o-glide and drizzle with the oil
  • Place on the top rung or on the floor of the roasting oven for 10 minutes, then remove it, turn the meat over and return the tray to the roasting oven for about 5 minutes. Your aim is to have golden brown pieces of pork; you’re not trying to turn it dark brown
  • Meanwhile  get on with your shallots. Heat a tablespoon or two of oil in the casserole you want to braise your pork in. Do this on the simmering plate. Add the shallots, turn them over in the oil, put the lid on and transfer the casserole to the simmering oven for about 15 minutes until they are soft and golden
  • Stir the garlic and ginger in and return the pork to the pan along with the kecap manis, soy sauce, tamarind and stock
  • Bring to the boil on the boiling or simmering plate, add the star anise and all the chillies and place your casserole, uncovered, in the simmering oven for about 3 hours but, as I’m sure you know, when slow cooking in the Aga simmering oven the timing is not crucial as long as you end up with meltingly tender meat
  • Remove the star anise and the whole chillies
  • Meanwhile make the crispy fried shallots by heating about 2cm of oil in a small pan on the simmering plate. Add the shallots and fry, moving them around, until they are crisp and golden. Remove with a slotted spoon to a sheet of kitchen towel on a plate and sprinkle with salt
  • If the liquid around the pork is not thick and glossy and seems a bit thin, remove the pork with a slotted spoon to a dish and keep it warm in the simmering oven. Boil the liquid for a while on the boiling or simmering plate until it’s reduced and then return the pork to the pan to heat through
  • Serve the pork with the crispy fried shallots sprinkled over. We ate ours with rice and stir-fried pak choi

Gigot Boulangère

Gigot Boulangère

I made a few mince pies this week. They’re now in the freezer but I might get them out this weekend as my youngest son is returning home from university and I think he’ll appreciate them. Apart from that and the Christmas cake, I haven’t done a huge amount of Christmas preparation but now that it’s December I will be getting my act together. I have had to postpone my plan to write up some of my Christmas recipes because I don’t have any decent photos to accompany them. I will aim to take lots of photos during this Christmas period so that I can write up the recipes in good time for Christmas 2018.

fullsizeoutput_2bac
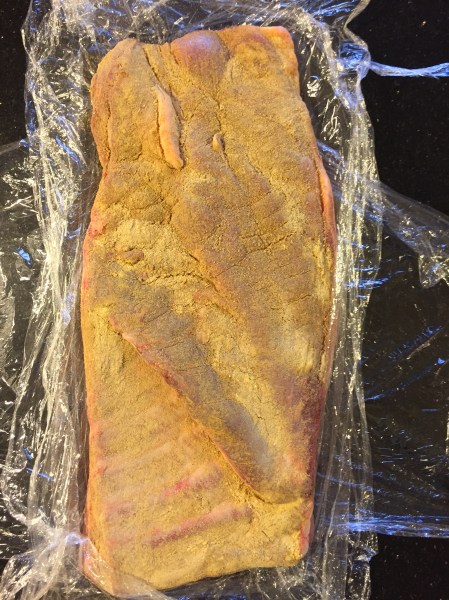
Meanwhile the Sunday roast continues to happen in our house and last Sunday it was gigot boulangère. If ever there was a dish that lends itself perfectly to Aga cooking, this is the one. If you love lamb and love boulangère potatoes, then this is one for you. On Sunday morning, after a cup of tea in bed with the papers on my iPad, I got up at 8 to prepare this dish. My neighbours may have caught a glimpse of me fetching some rosemary and nearly catching my death in my garden in my dressing gown.  In less than an hour though lunch was in the oven, to be more or less ignored until we were ready to eat it at 2pm.

Recipe

Serves 6

  • 1 leg of lamb weighing about 2.4kg
  • 1.8kg potatoes
  • 2 onions, peeled and sliced
  • Rosemary
  • 2 garlic cloves
  • Olive oil
  • Salt and pepper
  • 100ml white wine

Method

  • Pound the peeled garlic with 1 tsp salt flakes (I use Maldon sea salt) in a pestle and mortar until you have a rough paste
  • Add 1 tbsp olive oil and about 1 tbsp chopped rosemary to this
  • Give it a stir and season
  • Set aside
  • Drizzle some olive oil into the bottom of your large Aga roasting tin, which you have lined with bake-o-glide
  • Peel and thinly slice the potatoes. At this point many cooks would tell you to use a mandolin, but I don’t possess one so I use a nice sharp knife
  • Cover the base of the tin with a layer of potatoes followed by the onion slices, chopped rosemary and some seasoning and then the remaining potato slices
  • Pour over the white wine
  • Stab the leg of lamb all over with the point of a sharp knife and then rub in the garlic and rosemary paste you made at the start, massaging it into the slits you’ve made
  • Lay the lamb on top of the potatoes and hang the roasting tin on the third set of runners in the roasting oven and cook for 45 minutes
  • Transfer to the simmering oven for at least 4 hours but, as always, longer is fine, if not better
  • To serve, place the lamb on a large dish or board for carving, and the potatoes in a dish with all the juices. I put a bowl of redcurrant jelly on the table. Some mint sauce would have been nice too

Notes:

  • Conventional cooking: pre-heat the oven to 200ºC and cook the potatoes for about an hour before placing the lamb on top and roasting it for about 15 minutes per 500g depending on how you like it done.
  • There were only three of us for lunch on Sunday so I asked my butcher, Ruby and White, to give me just half a leg of lamb, as you will see in the above photos. I halved the quantities of the other ingredients and used the small Aga roasting tin.


Tomato Sauce for Pasta

Tomato Sauce for Pasta

We’re slowly adjusting to being empty nesters. Mind you, university terms are not that long and our youngest will be home for the Christmas holidays in just a few weeks. One thing I’m struggling with though, is reducing the amount of food I buy: I keep overestimating how much we’ll need. I imagine that just when I’ve got it right, it will be time to step up the quantities again for the family returning home for Christmas. And so it is that yesterday I suddenly remembered the San Marzano plum tomatoes I’d bought and not used. I don’t keep tomatoes in the fridge because they lose their flavour. This means they need to be used within a few days of purchase. My tomatoes were fine but starting to feel a bit squidgy; it was time to make a pasta sauce. Pasta with a really good homemade tomato sauce is one of my favourite dishes to eat. We probably had it at least once a week when my children were growing up and I still make it often. I have tried lots of different recipes over the years. The one I probably make the most is this one by Felicity Cloake. But sometimes I just make it up as I go along according to what I have in the cupboard and yesterday I decided to make a sauce using roast tomatoes, based on my friend Kate Percy’s from her book Go Faster Food (you don’t have to be an endurance athlete to enjoy her recipes: I’m certainly not one).  Roasting tomatoes is a great way to use them up when they’re past their best and it also intensifies the flavour of disappointingly insipid ones.

Ingredients

  • 3 x San Marzano tomatoes (or other plum tomatoes)
  • Extra virgin olive oil
  • Sugar
  • Salt and pepper
  • 250ml passata
  • Pinch chilli flakes (optional)
  • 1 clove garlic, peeled and crushed
  • 1 bay leaf
  • Glug of red wine vinegar
  • ½ tsp dried basil (or a couple of stalks of fresh basil if you have it)
  • 250g spaghetti or pasta of your choice

Method

  • (Pre-heat conventional (fan) oven to 140ºC or 170º if you’re in a hurry)
  • Place the tomatoes on a baking tray lined with bake-o-glide
  • Drizzle with olive oil and season with salt and pepper
  • Sprinkle lightly with sugar
  • Place in the simmering oven for 3-4 hours until shrivelled and the aroma is intense
  • Tip the roasted tomatoes and all the residual juices from the tray into a saucepan or small casserole
  • Squash the tomatoes down a bit with a wooden spoon, add the passata, garlic, bay leaf, chilli flakes, a little more olive oil, red wine vinegar and basil
  • Bring to simmering point on the simmering plate and transfer to the simmering oven for an hour or two for the flavours to meld and the sauce to thicken. You can leave it uncovered if you want it to thicken in less time than that
  • (Or simmer covered on a conventional hob at low temperature for half an hour to an hour, removing the lid towards the end if you feel it’s not thick enough)
  • Meanwhile cook the spaghetti until it’s al dente
  • Check the sauce for seasoning and toss the drained pasta in it
  • Serve with a drizzle of extra virgin olive oil and some freshly grated parmesan


Chicken with Za’atar and Aubergine Yoghurt

Chicken with Za’atar and Aubergine Yoghurt

This summer our second son is getting married. The excitement is building in the family – it’s the first wedding – and we are all busy in our different ways with preparations. Busiest of all are our daughter-in-law to be and her parents but now that his Part III architecture exams and coursework are out of the way, our son has also got stuck in. He’s been painting signs and designing and printing menus and orders of service. His super-efficient future wife has drawn up lists and rotas so that we all know what we’re doing in the build up to the day. The wedding will be in a church near her family home in Cornwall and the reception in a marquee in the garden. We have rented a cottage nearby so that we can be on hand to help and also have a holiday afterwards. Our son has chosen his brothers as the best men and all being well, they have sorted out a speech and who will deliver it (maybe it will be all three of them, I don’t yet know) and who will be responsible for the ring. Our youngest son is going to read a poem at the service and one of the bride’s sisters will be giving a reading.

My husband has chosen the wines (a tough job but someone’s got to do it, he says) with the help of willing tasters like me: a light and fruity Pinot Noir (Villa Maria Cellar Selection) from Majestic Wine Merchants; a Sauvignon Blanc (Cloudy Bay) from Avery’s, Bristol; and champagne from Waitrose. The caterers are booked, so we’re nearly set.

Every single one of us will be in the marquee on the day before the wedding, laying tables and decorating it with flowers. The logistics of getting everyone to Cornwall have been complicated but we seem to have cracked that now: youngest son will be arriving there on the eve of the wedding from a week’s walking and camping on the Isle of Arran and my sisters-in-law are going to ensure that my somewhat frail 92 year old mother-in-law gets there too.

We haven’t had a “whole family” holiday for three years so I’m looking forward to this one, even though it will not involve much lazing around. It’s a very happy occasion and a great excuse for us all to be together. I’m sure we will eat out (seafood please!) but I will also cook some meals in our rented kitchen. I want to keep these as simple as possible (nothing new there!). I will miss my Aga of course and hope I haven’t forgotten how to cook on a conventional cooker.

I’ve made this delicious chicken dish by Annie Bell a couple of times recently. It is one I can imagine making in Cornwall, provided the kitchen is equipped with big enough roasting tins.

Serves 6 (I made it first for 4 and then for 3, using two pieces of chicken per person and scaling down the other ingredients)

For the chicken

  • 2 lemons
  • 150ml extra-virgin olive oil
  • 3 garlic cloves, crushed
  • 1 red onion, finely chopped
  • 2 heaped tsps za’atar
  • 2 cinnamon sticks, broken in half
  • 1.8-2kg free-range chicken thighs and drumsticks
  • 50g pine nuts

For the aubergine yoghurt

  • 2 aubergines
  • 1 small or ½ garlic clove, crushed
  • 150g natural Greek yoghurt
  • 1 tbsp extra virgin olive oil, plus an extra couple of tbsp to serve
  • 1 tbsp lemon juice
  • 2 tbsp finely chopped flat-leaf parsley or coriander, plus extra to serve

Method

  • Slice one of the lemons, discarding the ends, and juice the other. Combine the lemon juice, olive oil, garlic, onion, za’atar, cinnamon and sliced lemon in a large dish. Add the chicken pieces and coat thoroughly with the marinade. Cover and chill for several hours or overnight.
  • For the aubergine yoghurt, preheat a conventional oven to 220ºC. Prick the aubergines all over with a skewer to stop them bursting, and roast for 45-60 minutes (in the Aga roasting oven) until wrinkled, blackened and soft, then leave to cool.
  • Cut off the ends, peel off the skin, halve lengthways and coarsely chop
  • Place the flesh in a sieve and press out the excess liquid using the back of a large spoon
  • Briefly whizz to a coarse purée with the garlic and some salt in a food processor
  • Transfer to a bowl and stir in the yoghurt, olive oil, lemon juice and parsley or coriander. Drizzle over the extra oil and scatter over some more herbs. Set aside
  • If you’ve turned it off, switch your oven back on to 220ºC
  • Season the chicken pieces and arrange, skin side up in a single layer in two roasting tins (the large Aga ones)
  • Option: if you have space you could add halved new potatoes to the tins. I did this
  • Drizzle the marinade over everything and tuck the lemon slices in between
  • Roast (in the Aga roasting oven) for about 45 minutes, swapping the tins round halfway through and sprinkling over the pine nuts after 15 minutes (I forgot to do this the second time I made this dish; it was still delicious but I recommend you try to remember them)
  • Serve with the yoghurt sauce and a green salad


Warm Salad of Griddled Chicken, Freekeh, Preserved Lemon, Sour Cherries and Mint

Warm Salad of Griddled Chicken, Freekeh, Preserved Lemon, Sour Cherries and Mint

The title for this recipe is very long, isn’t it? It’s another Diana Henry one but I’m making no apologies. I wanted to try freekeh (a cereal food made from unripened wheat which has been roasted and crushed into small pieces) because I’d never used it before so I pored over my various cookbooks and this was the recipe which appealed the most on the day. It’s perfect for the summer weather we’re having now. Instead of cooking the chicken in a griddle pan, you could barbecue it outside.

I’m enjoying the weather. We’ve barbecued twice this weekend, which has been lovely. My husband was supposed to be taking it easy after a small operation on Friday, but was up to standing at the grill while I got on with preparing vegetables and salads.

For the Chicken

Serves 4

  • 4 skinless boneless chicken thighs or breasts
  • 4 garlic cloves, grated or crushed
  • salt and pepper
  • juice of 1 lemon
  • 6 tbsp olive oil

For the Salad

  • 100g dried sour cherries
  • 2 preserved lemons
  • 200g freekeh
  • 1 tbsp olive oil
  • 4 tbsp extra virgin olive oil
  • 2 tsp honey (or maple syrup)
  • 3 tsp white balsamic vinegar
  • juice of ½ lemon
  • good pinch of ground cinnamon
  • laves from 10 sprigs of mint, torn
  • 10g chopped flat-leaf parsley

Method

  • If you are using breasts and they’re particularly thick, cut them in half horizontally. Marinate the chicken if you have time, even if it’s only for an hour or two. Mix the garlic, seasoning, lemon juice and olive oil in a dish and lay the chicken it it, turning it to coat. Cover with clingfilm and put in the fridge. Bring to room temperature before cooking
  • Place your griddle pan on the floor of the Aga roasting oven to get it really hot
  • Put the cherries in a small saucepan and add enough water to just cover. Bring to the boil on the boiling plate, then remove from the heat and leave to plump up for 30 minutes
  • Remove the flesh from the preserved lemons and discard. Cut the rind into slivers
  • Put the freekeh into a saucepan and cover with water, adding the regular olive oil and seasoning well. Bring to the boil on the boiling plate, then cover and transfer to the simmering oven for about half an hour, or until just tender. Drain
  • In a serving bowl mix the virgin oil, honey or maple syrup, white balsamic, lemon juice, cinnamon and plenty of salt and pepper. Add the drained freekeh and stir
  • Drain the cherries and fork them into the grains with the preserved lemon and most of the herbs
  • Place the heated griddle pan on the boiling plate and put the chicken on it (leaving the marinade behind)
  • Let it sizzle and splatter for two minutes, then turn it over. At this point you can place the griddle pan back on the floor of the roasting oven and leave the chicken to cook there for about 8 minutes until it’s cooked through. You can keep the griddle plan on the boiling plate and then move it to the simmering plate if you prefer but placing it in the oven minimises the amount of fat splattering everywhere
  • Taste the freekeh. You might want to add more lemon juice. The mixture should be moist and well-seasoned
  • Divide between four plates and serve the chicken on top or alongside, scattering the remaining herbs over. I served ours with some tzatziki

Our weekend in the garden: