Raspberry Yoghurt Cake

Raspberry Yoghurt Cake

If you’ve been reading this blog for a while you’ll know how fond I am of baking with raspberries. I’ve made this raspberry yoghurt cake twice now, once with regular flour and once with spelt and can honestly say there was no noticeable difference. The recipe is by Diana Henry – no surprises there! – and is from her book Simple. I love that the recipe was inspired by a cake she ate at a café in Nettlebed, a village in Oxfordshire, which holds many happy memories for me.

On the day Theresa May resigned I announced on Twitter that I was about to make this cake as a break from all the political drama, and there was quite a bit of interest, which is why I’m writing up the recipe for you today. The yoghurt doesn’t give the cake a yoghurt-y taste, if you know what I mean, but I think it gives it a lightness and makes it deliciously moist. It’s a perfect summer cake, but if you keep raspberries in your freezer, there’s nothing to stop you making it at other times of the year.

Raspberry Yoghurt Cake

Ingredients

  • 125g unsalted butter
  • 225g caster sugar
  • Finely grated zest of 2 unwaxed lemons
  • 1/2 tsp vanilla extract
  • 2 large eggs, lightly beaten
  • 300g plain flour or spelt flour
  • 2 tsps baking powder
  • 115g natural yoghurt (I love Yeo Valley Greek Style)
  • 200g raspberries

Icing

  • 150g icing sugar
  • Approx. 2 tbsps lemon juice
  • About 10 raspberries


Method

(Preheat conventional oven to 180ºC)

  • Butter a 22 x 12 x 7cm loaf tin and line the base with bake-o-glide or baking parchment
  • Beat the butter and sugar until pale and fluffy
  • Add the lemon zest and vanilla
  • Add the eggs, a little at a time, beating well after each addition
  • Put 2 tbsps of flour in a bowl and toss the raspberries in it
  • Mix the flour and baking powder together and fold this into the batter, alternating with spoonfuls of the yoghurt
  • Put one third of the batter into your loaf tin and add half the raspberries, spreading them out evenly
  • Put another one third of the batter on top followed by the remaining raspberries and finishing with the rest of the batter
  • Bake for about an hour and 15 minutes in the baking oven, but check after 40 minutes or so and cover it with foil if it seems to be colouring too much
  • A skewer should come out clean when it’s done. Leave the cake in the tin for 10 minutes before turning it out onto a wire rack to cool
  • Mix the icing sugar with the lemon juice until smooth
  • Spread two thirds of this on the cooled cake
  • Partly crush the 10 raspberries and add them to the remaining icing. Don’t completely mix them in; you just want them to stain bits of the icing. Pour over the cake


MfzIZpolQFyiSTlNbpbp4Q


Spiced Apple Cake

Spiced Apple Cake

My plan for today was to tell you about the most delicious veal ragù I’d made but I’m afraid it was disappointing and I can’t quite work out what went wrong. I guess you win some and you lose some. I won’t give up though and when I get it right, I will let you know. Meanwhile, there’s my trusty old favourite ragù which I wrote about here.

So instead I want to tell you about an apple cake recipe I’ve recently fallen in love with. Forgive me for giving you another apple cake recipe but this one is too good to ignore. You probably aren’t surprised though, because I believe I’ve mentioned in previous posts how much I love apple cake.

There’s something about the slightly caramel flavour of this one that reminds me of the plum torte I wrote about here; the soft brown sugar is probably responsible. I came across the recipe on the Spectator website.

Spiced Apple Cake

Ingredients

  • 1 large cooking apple
  • 1 eating apple
  • 200g unsalted butter, melted (by placing it in a bowl on top of the Aga at the back) fullsizeoutput_317d
  • 225g light brown sugar
  • 225g self-raising flour
  • 2 eggs
  • 1 tsp ground cinnamon
  • ¼ tsp ground nutmeg
  • 1 tsp baking powder
  • 1 tbsp caster sugar


Method

(Pre-heat conventional oven to 160ºC)

  • Lightly grease and line a 9″/23cm cake tin with bake-o-glide
  • Place the brown sugar, flour, baking powder, cinnamon and nutmeg in a large bowl and rub between your fingers to get rid of any lumps in the sugar
  • Briefly whisk the eggs in a small bowl using a fork and then add them and the melted butter to the dry ingredients, quickly mixing the whole lot together with a spatula
  • Peel and core the apples and cut each into 12 wedges
  • Pour three quarters of the mixture into your prepared tin and arrange the apple slices in a circle, alternating cooking and eating apples and starting from the outside. Place any spare segments in the centre of the circle
  • Spoon the rest of the mixture into the middle of the cake and don’t try to spread it to the sides. Sprinkle over the caster sugar
  • Bake in the baking oven, or whichever oven you use for cakes, for about 50 minutes until the top is golden brown and taught. Leave in the tin to cool for 10 minutes

Can be served warm or cold. I love serving any apple cake with whipped cream, but it’s up to you.


Lemon and Ricotta Cake

Lemon and Ricotta Cake

The first lemon and ricotta cake I made was not a success. It was a Jamie Oliver recipe and didn’t really work, producing a rather dense cake. It may of course be entirely my fault and I might try it again one day. On the other hand, I’m not sure why I’d bother because yesterday I made a Diana Henry version from her book Simple and it was light and moist and delicious.

This cake works as an afternoon tea cake but also as a dessert served perhaps with some berries and crème fraîche or whipped cream. It’s best eaten slightly warm. It’s the ricotta that makes the cake moist but it also means it doesn’t keep that well. Don’t do what I did and make it on a day when hardly anyone’s around to share it with you because it really is best eaten on the day it’s made. If you do have some left, wrap it in clingfilm and refrigerate it. This is what I did and the next day I gave it a blast (a minute or two at high heat) in the microwave to warm it up a little and it freshened up beautifully. I was thrilled when our Italian friend, who is very particular about the food of his homeland and whose late wife was the most wonderful cook, gave it his approval.

Lemon and Ricotta Cake

Serves 8 (depending on hunger/greed)

You will need a 20cm springform tin, lightly greased and base-lined (with bake-o-glide)

Ingredients

  • 175g unsalted butter, softened
  • 175g golden caster sugar
  • Finely grated zest of 4 unwaxed lemons and the juice of 3
  • 3 large eggs, separated
  • 250g fresh ricotta, drained in a sieve
  • 100g self-raising flour, sifted
  • 25g ground almonds
  • 1 tsp baking powder
  • Icing sugar to serve

Method

  • Beat the butter and sugar together in an electric mixer until light and fluffy
  • Lightly beat the egg yolks with a fork and gradually add them, beating well after each addition
  • Stir the lemon zest and drained ricotta into the batter
  • Whisk the egg whites until they form medium peaks
  • Stir the lemon juice into the batter, then fold in the flour, almonds and baking powder
  • Fold two big spoonfuls of the egg whites into the batter to loosen it, then fold in the rest
  • Scrape the batter into the prepared tin
  • Put it in the baking oven and bake for 45-50 minutes; a skewer inserted into the middle of the cake should come out clean once it’s cooked
  • Leave to cool in the tin for 10 minutes or so, then remove the springform ring and let it continue to cool, although as I mentioned above it’s delicious served slightly warm
  • Dust with icing sugar to serve


Norwegian Bløtkake

fullsizerender-2

This traditional Norwegian celebration cake (translation: soft cake) is part of my childhood in a way that no other food is. My grandmother, aunts, and mother all baked it regularly when I was growing up and then my mother passed the recipe on to me. Nowadays when we go on holiday to Norway, it’s my cousins who make the bløtkake and no doubt they have passed the recipe down to their children as I will to mine.

My mother is a great cook and loved introducing her British friends to Norwegian specialities, but when she was first married to my (English) father she also learnt to do an excellent Sunday roast and many other British recipes. She would make a bløtkake for our birthdays and if friends were coming round. For a few years she ran a small catering firm specialising in parties and weddings, and this cake was probably what her customers requested the most. I can remember helping her with deliveries sometimes which involved me sitting in the passenger seat of her car with the cake in a container on my lap, hoping we didn’t have to brake suddenly.

The cake is not complicated or difficult to make. It uses a fatless sponge so you needn’t feel guilty about the amount of cream required to make this cake delicious and special. I made it recently for my youngest son’s 18th birthday.

Ingredients

You will need an 8″ or 9″ springform cake tin, very lightly greased and base-lined.

  • 5 large eggs
  • 125g caster sugar
  • 125g self-raising flour
  • 300ml (or more) double or whipping cream
  • Fruit: strawberries, raspberries, blueberries or banana or combinations of these. I’m sure you will come up with other wonderful fruit ideas, depending on the season. The one above was a mixture of raspberries and blueberries. I also can’t give you quantities but I’m sure you’ll manage
  • Juice or milk for moistening the sponge

Method

  • Pre-heat a conventional oven to 150ºC
  • Whisk the eggs and sugar (ideally in a mixer or using an electric hand whisk) for 8-10 minutes (depending on the power of your whisk) until thick and very pale in colour. When you lift the whisk the mixture will leave a trail like a ribbon
  • Then fold in the flour; do this gently to keep in as much air as possible
  • Pour the mixture into your prepared tin and bake in the baking oven (see above for conventional oven temp) for about 25-30 minutes. Check it at 20 minutes and maybe turn it round so the other “side” is nearer to the back. If using a conventional oven, don’t even think about opening the door until it’s been in for 20 minutes. It is done if it springs back when pressed down gently with your finger
  • Cool on a rack for at least 10 minutes before turning it out of the tin. Leave it to cool upside down
  • When the cake is cold slice through the middle horizontally so you have two pieces. Even better, slice it into three layers.  In fact, I wish I’d done this for my son’s cake and will definitely do it next time. It makes a more impressive, moist and luscious cake. You may need more cream but given it’s a cake based on having lashings of cream, who’s going to quibble about that?
  • You need to moisten the sponge layers before filling the cake. You can use juice from the fruit (I had frozen raspberries which released a lot of juice after defrosting); or a little diluted elderflower cordial; or milk. We’re only talking about a couple of dessert spoonfuls
  • Whip the cream
  • Sandwich the cake together with the cream and fruit. Be generous with both
  • Finally, spread the rest of the whipped cream thickly over the whole cake and decorate with a little more fruit
  • It is customary to cut a circle in the middle of the cake and slice it from there. If it’s a birthday cake, the round piece can be saved for the birthday boy or girl

One more thing: if you don’t eat the whole cake at first sitting, and it is definitely best when fresh, make sure you store it in the fridge.

Update

My mother has read this post and passed on a tip which finishes the cake off nicely: keep back a little cream for piping round the bottom. As you can see from the photos, mine has a bit of a gap and would have been improved hugely if I had done this. What can I say, except I clearly haven’t inherited my mother’s knack for presentation.

Aga Christmas Cake

Aga Christmas Cake


It’s that time of year again. I always resist the commercial pressure to start Christmas shopping in September. It infuriates me that Christmas cards and decorations start appearing in the shops in August, throwing everyone into panic, and the more I’m urged to prepare, the less inclined I am to do so. Oh, and no mince pies are allowed in my house until December. But there are some things which it has always been necessary to do a few weeks or months ahead of the event and one of those is baking the Christmas cake. The same goes for the pudding but I must be honest and say I do not always make my own pudding. I’ve found there are excellent ones you can buy. For the last two years I’ve bought a pudding from Bertinet’s in Bath and they’ve gone down well with my family. I haven’t yet decided what I’m going to do about pudding this year; I might try Richard Bertinet’s recipe which is to be found online here. But the Christmas cake has to be homemade and I am always happy to set aside the time to make it.

Since owning my Aga I’ve used the Mary Berry Christmas cake recipe in The Aga Book. It’s delicious and I see no reason to change. She gives quantities for many different cake sizes, square and round. My usual size is the 10″/25cm round cake and that is what I have made this year. As with all fruit cakes, it is best when baked slowly in the simmering oven. I made mine in the afternoon and it was happy to wait in the tin and be placed in the oven at bedtime. This year it took nine hours and last year ten. Am not sure why the timings were different but it’s nothing to worry about.

Here’s the recipe for those of you who haven’t got The Aga Book.

Mary Berry’s Aga Christmas Cake (with a few modifications by me)

You will need a 10″/25cm loose bottomed or springform sturdy cake tin, greased and the base and sides lined (I used bake-o-glide)

Ingredients

  • 675g currants
  • 450g sultanas
  • 225g raisins
  • 450g glacé cherries
  • Grated zest of 2 oranges
  • 300ml sherry (I used Harvey’s Bristol Cream)
  • 350g butter, softened
  • 350g dark brown sugar
  • 6 eggs
  • 100g self-raising flour
  • 225 plain flour
  • 100g blanched, chopped almonds
  • 2 tbsp black treacle
  • 2 tsp ground mixed spice

Method

  • Rinse, dry and quarter the cherries
  • Put all the fruit and orange zest in a container, pour over the sherry and give it a stir
  • Cover with a lid or a couple of layers of tightly sealed clingfilm and leave to soak for 3 days, stirring daily
  • Measure the butter, sugar, eggs, treacle and chopped almonds into a mixing bowl (I used my KitchenAid) and beat well
  • Add the flours and spice and mix thoroughly until blended
  • Stir in the soaked fruit and sherry
  • Spoon the mixture into the prepared tin and level out evenly
  • Bake in the simmering oven for about 9 hours, but keep an eye on it at the 8 hour point. It is done when a warm skewer comes out clean
  • Leave to cool in the tin then turn it out, feed it (see below) and wrap it. I like using parchment lined foil for this (from Lakeland)

Feeding

On a weekly basis from now on you are going to need to feed your cake: take a darning needle and pierce the cake all over, top and bottom; drizzle over a couple of teaspoons of sherry, let it sink in and then turn the cake over and do the same on the other side. Then wrap the cake and place it inside a (large!) airtight container.

Icing

About a week before Christmas I ice my cake with marzipan. I usually buy it but have been known to make my own; homemade is definitely better but sometimes I go for the quicker option. Once the almond icing has dried out, after a few days, I place the final layer of icing on my cake; invariably on Christmas Eve. For this I use ready-to-roll fondant icing. I do not make my own.

My husband took photos and I added captions to some to indicate the different stages.

And finally the finished cake, which we first sliced into on 28 December:


Norwegian Apple Cake

Norwegian Apple Cake


In this post a year ago I mentioned my Norwegian grandmother’s apple cake. It has become a Hardy family tradition to have it on Christmas Eve, but that doesn’t stop us having it at other times of the year. I have vivid memories of evening coffee time at my grandparents’ house in Oslo when cake would often be served.

I made the Norwegian apple cake this weekend for second son’s birthday. It’s not a typical birthday cake but I don’t think that matters. We managed to get his brothers to come along and gathered in London for tea and cake which we consumed while watching the England v Wales Six Nations rugby match. img_6492

I don’t think my grandmother, who is no longer with us, would mind if I gave you the recipe.  It’s extremely easy to make. You can keep it just as it is, or add cinnamon to the apples or sprinkle some flaked almonds over it, or both.

Norwegian Apple Cake

You will need a 20cm/8″ springform cake tin, greased and base-lined with greaseproof paper or bake-o-glide.

Conventional oven: pre-heat to 160º-170ºC

Ingredients

  • 4 Bramley apples
  • 125g plus 1 tbsp caster sugar
  • 125g butter, softened
  • 240g self-raising flour
  • 1 large egg

Method

  • Peel, core and slice the apples and place the slices in a bowl with the juice of a lemon to stop them going brown. Add the tablespoon of sugar
  • Place the apples in a saucepan with a little water, let’s say 3mm deep. Cook them for a minutes on the Aga simmering plate or your hob, giving them the occasional stir with a wooden spoon. When they’re all soft, remove from the heat and leave to cool
  • Make your cake batter by placing the sugar, butter, flour and egg in a bowl and beating the mixture. I use my electric mixer
  • Press two thirds of this mixture into the base of your prepared tinimg_4305
  • Then spoon the stewed apples over this but not right up to the edge. If you feel you have too much apple mixture (after all, Bramleys vary in size) save some (freeze it if necessary) to have with roast pork at a later date
  • On a floured surface very gently roll out the remaining third of the batter and then cut it into strips about 1.5cms wide
  • Arrange these strips in a lattice pattern over your cake. You don’t have to make a complicated over and under pattern. The dough is very soft and the strips might break as you pick them up. img_4306Don’t worry: you can just patch them together as you place them. As you can see from the photos, mine does not look remotely professional
  • Bake your cake until golden brown. You can’t test it because of the apples.  I find it usually takes between 35 and 45 minutes.  I start checking it at about 25.
  • You can serve it warm (but not piping hot) or at room temperature, dusted with icing sugar and cinnamon. I’m not a cream person but this cake really is best served with a dollop of lightly whipped cream.img_4319

Another Day, Another Apple Cake


img_3827


I hope it’s still correct to say apples are in season, because it’s already a couple of weeks since I made this apple cake with autumn in mind and only now am I getting round to writing about it.  On the other hand, it’s not exactly a seasonal cake because we all cook with apples throughout the year and to make this cake I bought Bramley apples from the supermarket.

Regular readers will remember that I like making apple cakes and prefer them to pies and crumbles, partly because they work both as puddings (with whipped cream, say) and as teatime cakes.

You can’t have two many apple cake recipes in your repertoire, in my view, and I’m happy to add this Delia recipe to mine.  The lazy baker in me particularly appreciated the fact that peeling the Bramleys is optional.  That was a no brainer: I didn’t peel them.

To make the job even simpler I used the all-in-one method to mix all the ingredients together before folding in the apples and orange zest.

Ingredients

  • 225g self-raising flour
  • 1 rounded teaspoon baking powder
  • 1 tsp mixed spice
  • 1/2 tsp cinnamon
  • 3 Bramley apples
  • 175g soft light brown sugar
  • 2 large eggs
  • 75g butter, softened
  • Grated zest of an orange
  • 1 tbsp milk (if needed)
  • A little icing sugar

Method

  • Conventional oven: pre-heat to 180ºC
  • Grease and base-line a 20cm loose bottomed cake tin
  • Sift the flour, baking powder and spices into your mixing bowl and add the butter, sugar and eggs
  • Beat until thoroughly blended.  I used my KitchenAid.  You could use an electric hand whisk
  • Chop the apples into small dice (with or without peel, remember) and fold into the mixture with the orange zest.  Add a little milk if the mixture seems dry
  • Spoon the mixture into your prepared tin
  • Bake in the baking oven of your Aga (or in the centre of a conventional oven at 180ºC) for about 1 hour, but do check on it every 10 minutes or so after the first half hour.  I put a piece of greaseproof paper loosely on top at this point because my cake was looking a little dark
  • The cake is done when it feels springy to touch and is starting to shrink away from the sides of the tin
  • Cool in the tin for 10 minutes or so before turning out onto a rack
  • Sprinkle with icing sugar to serve


Plum Torte


When I posted a photo of this to Instagram yesterday I called it plum cake but it’s officially a torte and with just the two eggs, it is definitely a little less cake-y than most cakes.

Anyway, I recommend the recipe to you.  I bought a whole load of Victoria plums on Friday with the vague intention of doing a seasonal weekend bake but with no specific recipe in mind.  I couldn’t find the Diana Henry recipe I thought I had in one of her books so I Googled “Diana Henry plum cake” and this was the result.  The observant among you will notice it uses purple plums, but I saw no reason to let that put me off and brazenly set to work with my pinkish yellow Victoria ones.

I do hope it’s fine to post the recipe here.

Ingredients

  • 125g plain flour
  • 1tsp baking powder
  • pinch of salt
  • 115g butter, softened
  • 200g soft light brown sugar
  • 2 large eggs
  • 1 tsp vanilla extract
  • about 9 plums, halved and stoned
  • 1 tbsp granulated sugar
  • 2 tsp lemon juice

Method

(Preheat conventional oven to 180ºC)

You will need a 23cm springform tin.  Not sure why but Henry says ungreased.  I obeyed and it came out fine.

Don’t forget the sugar and lemon juice topping; I haven’t tried it without but have a feeling it makes all the difference, to both taste and texture.

  • Henry doesn’t, but I used the all-in-one method and placed all the ingredients except for the plums, granulated sugar and lemon juice in the bowl of my KitchenAid and mixed at high speed for about 2 minutes until thoroughly blended.
  • Spoon the mixture into your tin and place the plums, skin-side up, on top.
  • Sprinkle the granulated sugar and lemon juice over the cake and bake (in the Aga baking oven).  Takes about 45 minutes, in a conventional oven or the Aga.
  • The cake is done when it starts to come away from the sides of the tin and a skewer inserted into the middle comes out clean.
  • Leave it to cool for 20 minutes on a rack and then release from the tin.  Be careful: it’s quite fragile and the plums have probably sunk to the bottom but this doesn’t matter at all.
  • We ate it at room temperature but it would have been just as delicious slightly warm.


Glazed Lemon Cake


IMG_1268

The cake

Parliament has gone into recess, a new Prime Minister is in place and the schools have broken up, so it’s probably not too soon to say that the political scene will calm down a little following the tumultuous four weeks since the EU Referendum result.  For this news junkie it will mean more time for neglected chores but more importantly, even though we’re not going away on holiday this year, for doing nice things with friends and family.

And now is when it starts.  It’s the time of year again when I make a birthday cake for my eldest son, who is 29 today, which is hard to believe.  For the last three years he’s shared his birthday with Prince George.  Two of his brothers and I celebrated his 26th birthday over lunch in a Cambridge restaurant and I recall that they were irritated with me because I kept glancing at my phone to see if there were any news alerts about the royal baby.  It had been announced earlier that morning that the Duchess of Cambridge had gone into labour.

I can’t remember if I made a birthday cake on that occasion, but I like to bake one for all my boys’ birthdays if it’s practical.  The eldest was on an expedition in Ecuador for his seventeenth birthday and there’s a great photo of him waking up in his sleeping bag to be presented by his friends with a cupcake bearing a single candle.  He lives in Cambridge and a couple of years ago, because we weren’t going to manage to meet up around the big day, I ordered him two cakes from that great Cambridge institution, Fitzbillies.  (If you ever visit, you have to try their Chelsea Buns.)  I couldn’t decide between the chocolate and the carrot so bought both (in the smallest size).  Extravagant, but I knew he’d be sharing them with friends.

When he was small I wasn’t really into baking and anyway, was working full-time and didn’t feel I had much time in my life for it.  But I did usually manage to make some sort of sponge cake and get my husband, who is more creative than me, to cut it up and shape it into whatever the boy was into that particular year, ready for me to slather it in buttercream.  For example, we made a train when he was two and a football pitch when he was five.

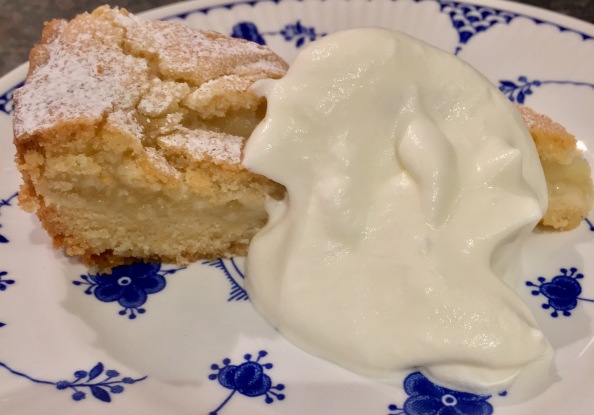
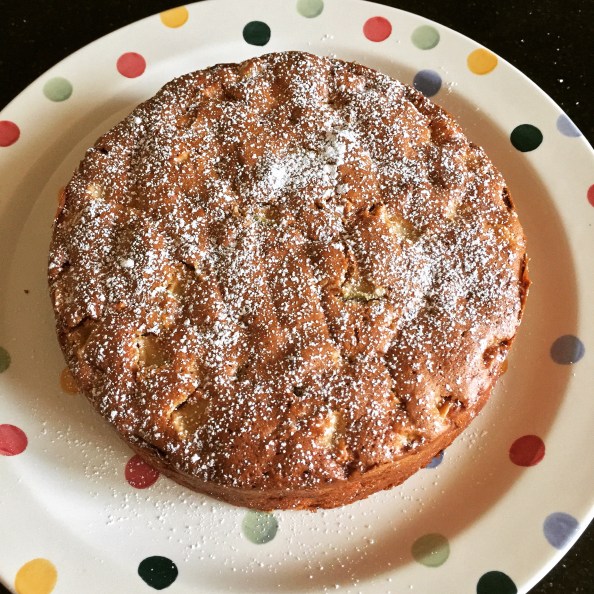
This year, not for the first time, I’ve made his favourite Glazed Lemon Cake from the Silver Palate Cookbook.  It’s not particularly quick to make, what with seven lemons to zest and a lengthy icing process, but worth it for an occasion and one cake goes a long way and keeps well in an airtight container.

We are all meeting up in London this weekend to celebrate the birthday.  I will be travelling up alone on the train and have to work out a way to get the cake there without damaging it.  I know it freezes well so I’ve decided to freeze it and let it gradually thaw during the journey.  That way it will be very fresh by teatime and also not too squishy while in transit.
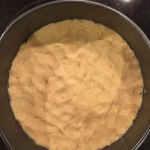
Glazed Lemon Cake

You will need a bundt tin, greased, or a tube tin, as it’s called in The Silver Palate Cookbook, which is American.

Conventional oven: pre-heat to 160ºC

You want the lemon zest to be very finely grated.  I find a Microplane grater is best for this.

Ingredients

  • 7 lemons (you’ll need all the zest but the juice of only 3 or 4)
  • 225g unsalted butter
  • 400g granulated sugar
  • 3 eggs
  • 375g plain flour
  • 1/2 tsp baking powder
  • 1/2 tsp salt
  • 284ml buttermilk
  • 2 tightly packed tbsps grated lemon zest
  • 2 tbsps fresh lemon juice
  • Lemon icing: see below

Method

  • Cream butter and sugar until light and fluffy. Beat in the eggs, one at a time, blending well after each addition
  • Sift together flour, baking powder and salt. Stir dry ingredients into egg mixture alternately with buttermilk, beginning and ending with dry ingredients. Add lemon zest and juice
  • in Full disclosure: as you know, I’m a fan of the all-in-one method and it works for this cake too. Mix thoroughly all the ingredients except the zest and juice and fold these in at the end
  • Pour batter into the prepared tin. Set on the middle rack of a pre-heated conventional oven or on the rack on the bottom rung in the Aga baking oven. Bake for 1 hour 5 minutes (conventional) or slightly less time in the Aga
  • For Aga baking I check the cake after 30 minutes and turn it, and then check it every 10 minutes to make sure the top isn’t burnt. It shouldn’t take more than 1 hour in total. It’s done when a skewer comes out clean

Lemon Icing

  • 450g icing sugar
  • 113g unsalted butter, softened
  • 3 tightly packed tbsps grated lemon zest
  • Juice of about 2 lemons
  • Place the sugar, butter and about half the juice in a mixing bowl and gradually blend them using a handheld mixer. When smooth, mix in the remaining juice and zest. Note: this icing is a lot runnier than buttercream icing.
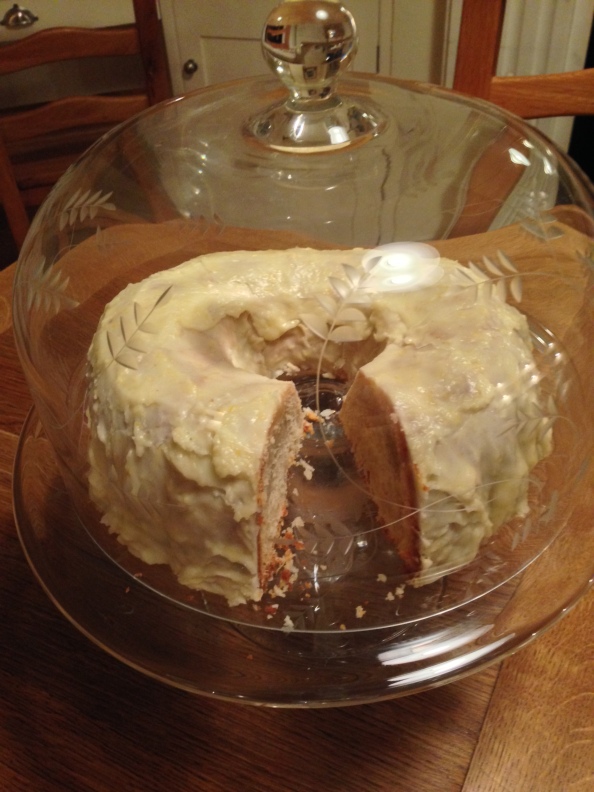
  • When the cake has been out of the oven for about 10 minutes, gently pierce it all over using the narrow end of a chopstick. Spoon over about a third of the icing and allow it to sink in for about 5 minutes before turning out the cake onto a cooling rack
  • Pierce the other side of the cake all over and begin spooning over the remaining icing. It will slide down the sides and end up on your board/work surface but you just have to keep scooping it up and pouring it over the top again. This is the boring, lengthy bit: it could take half an hour until the icing has stopped sliding off the cake and  has mostly sunk into it. See slide show below:


This slideshow requires JavaScript.
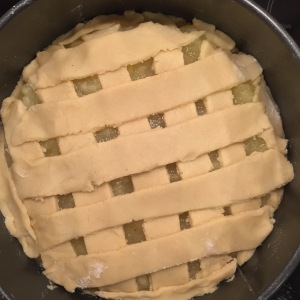
Sticky Almond Cake

IMG_3164

It is said that marzipan is a bit like Marmite in that you either love it or hate it. I absolutely adore it and hence this cake, which comprises a thick layer of the stuff in the middle. This is the reason for the “sticky” in the title. Cakes made with ground almonds tend to be deliciously moist anyway, but the addition of marzipan takes it to a whole new level. I made this cake for my book club last week and received compliments and requests for the recipe. Even my husband, who normally doesn’t like marzipan, loved it.

This cake can also be seen as relief from the relentless EU referendum debate. At last the day has finally arrived and all we can do is cast our votes and wait for the result. In a conversation with a Twitter mate, the other day, we bemoaned how nasty conversations had become, with people who normally share similar political outlooks finding themselves on opposite sides. She and I decided we’d change the subject and discuss recipes instead, and that is how I’ve come to be writing about this cake. So, @soyoprincess, this is for you.

Sticky Almond Cake

Ingredients

  • 225g butter
  • 225g caster sugar
  • 4 large eggs
  • 50g plain flour
  • 150g ground almonds
  • 350g marzipan (white, preferably)

Method

  • Grease and base-line (with bake-o-glide or parchment) a 23cm springform cake tin
  • Place the butter, sugar, eggs, flour and ground almonds in a bowl and beat until thoroughly mixed.  I did this in my KitchenAid mixer but an electric hand whisk will also do the job
  • Roll out the marzipan to the size of your cake tin and using the tin as template, cut in a circle
  • Place half the mixture in the tin and top with the marzipan, then cover with the remaining mixture
  • Bake in the baking oven, or conventional at 180ºC. Start to check it at 45 minutes and cover with foil or parchment if necessary. It’s ready when it’s firm to touch. Sorry to be vague but this can take an hour or as long as an hour and a quarter
  • Cool in the tin for 5 minutes and then remove to a rack
  • Dust with icing sugar before serving
  • This cake keeps for several days; in fact, it improves with age