Christmas Pudding

Christmas Pudding

As I confessed in my recent Christmas Cake post here I don’t always do a homemade Christmas pudding. After writing that, it struck me that this was really very lazy of me. “Call yourself a cook?” I asked myself, and resolved there and then to make one this year and every year. Honestly, it’s so incredibly easy and quick to make and doesn’t involve sophisticated baking skills.

The first thing you need to do is find a recipe. The one I recommend is this one by Bertinet’s in Bath. I’ve also bought Bertinet’s puddings in the past so when I found this recipe I was confident it would be delicious. I’ve also made Delia’s pudding (pretty sure you’ll find it online if you haven’t got her wonderful, and in my case much used, Christmas book) and one by the great Nigel Slater. My preference will always be not to mess about with the recipe and to stick to traditional ingredients, but if you fancy trying something a bit different, there are plenty of suggestions out there. For me, part of the beauty of preparing the Christmas meal is that it is the same (more or less) every year. With all that’s going on at that time of year, and the many tasks that need to be done, it takes the pressure off if you are not having to think up a new, imaginative menu on top of everything else.

So back to my pudding. You will see from the photos that I could not fit all my mixture in the recommended 2 pint basin and ended up with an additional small pudding; I intend to give this as a gift to the hostess of a party we’ve been invited to.

Christmas Pudding

Ingredients

You will need a 2 pint pudding basin (and maybe an additional small basin – see above)

  • 100g currants
  • 200g seedless raisins
  • 200g sultanas
  • 60g glacé cherries
  • 60g chopped candied peel
  • 90g blanched almonds, sliced into slivers
  • ½ cooking apple, peeled, cored and coarsely chopped
  • ½ carrot, peeled and grated
  • Zest and juice of half an orange
  • Zest and juice of half a lemon
  • 115g finely chopped suet
  • 115g plain flour
  • 60g white bread or brioche crumbs
  • 115 soft brown sugar
  • ½ tsp mixed spice
  • ½ tsp ground cinnamon
  • ¼ nutmeg, grated
  • ½ tsp salt
  • 3 eggs
  • ½ can Guinness
  • 2 tbsps brandy

Method

  • Put all the ingredients, apart from the orange and lemon juices, brandy, Guinness and eggs, into a large bowl and mix thoroughly
  • In a separate bowl beat the eggs until frothy and add the orange and lemon juices, Guinness and brandy
  • Add to the mixture in the other bowl and mix thoroughly until all incorporated
  • Fill your basin with the mixture and place a circle of greaseproof paper on top
  • Place in the fridge for at least 12 hours but up to 48 hours

Steaming: one way

  • Cover the pudding with clingfilm and then take a saucepan which holds the pudding basin and make sure you can fit the lid on
  • Place the pudding in it and pour in water about half way up the basin
  • Bring this to the boil on the boiling plate
  • Check the water level, put the lid on or cover with foil and place in the simmering oven to “steam” for at least 12 hours. Do it overnight and you will wake up to a heavenly Christmas-y aroma

Steaming: another (even easier) way

  • I recently discovered that even this initial steaming can be done in the Aga simmering oven without using any water at all. This is thanks to Sarah Whitaker, the all round Aga guru. All you do is cover the basin in foil or clingfilm and place it at the back of the simmering oven for 12 hours or overnight
  • Leave the pudding to cool in its clingfilm
  • You could then wrap it in muslin and tie it with string as you can see in the photo above. Foil or extra clingfilm would be fine; I just think it looks pretty (and traditional) in the muslin
  • On Christmas Day all you have to do is put the basin, wrapped in foil, in the simmering oven for four hours. How easy is that?

Norwegian Bløtkake

fullsizerender-2

This traditional Norwegian celebration cake (translation: soft cake) is part of my childhood in a way that no other food is. My grandmother, aunts, and mother all baked it regularly when I was growing up and then my mother passed the recipe on to me. Nowadays when we go on holiday to Norway, it’s my cousins who make the bløtkake and no doubt they have passed the recipe down to their children as I will to mine.

My mother is a great cook and loved introducing her British friends to Norwegian specialities, but when she was first married to my (English) father she also learnt to do an excellent Sunday roast and many other British recipes. She would make a bløtkake for our birthdays and if friends were coming round. For a few years she ran a small catering firm specialising in parties and weddings, and this cake was probably what her customers requested the most. I can remember helping her with deliveries sometimes which involved me sitting in the passenger seat of her car with the cake in a container on my lap, hoping we didn’t have to brake suddenly.

The cake is not complicated or difficult to make. It uses a fatless sponge so you needn’t feel guilty about the amount of cream required to make this cake delicious and special. I made it recently for my youngest son’s 18th birthday.

Ingredients

You will need an 8″ or 9″ springform cake tin, very lightly greased and base-lined.

  • 5 large eggs
  • 125g caster sugar
  • 125g self-raising flour
  • 300ml (or more) double or whipping cream
  • Fruit: strawberries, raspberries, blueberries or banana or combinations of these. I’m sure you will come up with other wonderful fruit ideas, depending on the season. The one above was a mixture of raspberries and blueberries. I also can’t give you quantities but I’m sure you’ll manage
  • Juice or milk for moistening the sponge

Method

  • Pre-heat a conventional oven to 150ºC
  • Whisk the eggs and sugar (ideally in a mixer or using an electric hand whisk) for 8-10 minutes (depending on the power of your whisk) until thick and very pale in colour. When you lift the whisk the mixture will leave a trail like a ribbon
  • Then fold in the flour; do this gently to keep in as much air as possible
  • Pour the mixture into your prepared tin and bake in the baking oven (see above for conventional oven temp) for about 25-30 minutes. Check it at 20 minutes and maybe turn it round so the other “side” is nearer to the back. If using a conventional oven, don’t even think about opening the door until it’s been in for 20 minutes. It is done if it springs back when pressed down gently with your finger
  • Cool on a rack for at least 10 minutes before turning it out of the tin. Leave it to cool upside down
  • When the cake is cold slice through the middle horizontally so you have two pieces. Even better, slice it into three layers.  In fact, I wish I’d done this for my son’s cake and will definitely do it next time. It makes a more impressive, moist and luscious cake. You may need more cream but given it’s a cake based on having lashings of cream, who’s going to quibble about that?
  • You need to moisten the sponge layers before filling the cake. You can use juice from the fruit (I had frozen raspberries which released a lot of juice after defrosting); or a little diluted elderflower cordial; or milk. We’re only talking about a couple of dessert spoonfuls
  • Whip the cream
  • Sandwich the cake together with the cream and fruit. Be generous with both
  • Finally, spread the rest of the whipped cream thickly over the whole cake and decorate with a little more fruit
  • It is customary to cut a circle in the middle of the cake and slice it from there. If it’s a birthday cake, the round piece can be saved for the birthday boy or girl

One more thing: if you don’t eat the whole cake at first sitting, and it is definitely best when fresh, make sure you store it in the fridge.

Update

My mother has read this post and passed on a tip which finishes the cake off nicely: keep back a little cream for piping round the bottom. As you can see from the photos, mine has a bit of a gap and would have been improved hugely if I had done this. What can I say, except I clearly haven’t inherited my mother’s knack for presentation.

Aga Christmas Cake

Aga Christmas Cake


It’s that time of year again. I always resist the commercial pressure to start Christmas shopping in September. It infuriates me that Christmas cards and decorations start appearing in the shops in August, throwing everyone into panic, and the more I’m urged to prepare, the less inclined I am to do so. Oh, and no mince pies are allowed in my house until December. But there are some things which it has always been necessary to do a few weeks or months ahead of the event and one of those is baking the Christmas cake. The same goes for the pudding but I must be honest and say I do not always make my own pudding. I’ve found there are excellent ones you can buy. For the last two years I’ve bought a pudding from Bertinet’s in Bath and they’ve gone down well with my family. I haven’t yet decided what I’m going to do about pudding this year; I might try Richard Bertinet’s recipe which is to be found online here. But the Christmas cake has to be homemade and I am always happy to set aside the time to make it.

Since owning my Aga I’ve used the Mary Berry Christmas cake recipe in The Aga Book. It’s delicious and I see no reason to change. She gives quantities for many different cake sizes, square and round. My usual size is the 10″/25cm round cake and that is what I have made this year. As with all fruit cakes, it is best when baked slowly in the simmering oven. I made mine in the afternoon and it was happy to wait in the tin and be placed in the oven at bedtime. This year it took nine hours and last year ten. Am not sure why the timings were different but it’s nothing to worry about.

Here’s the recipe for those of you who haven’t got The Aga Book.

Mary Berry’s Aga Christmas Cake (with a few modifications by me)

You will need a 10″/25cm loose bottomed or springform sturdy cake tin, greased and the base and sides lined (I used bake-o-glide)

Ingredients

  • 675g currants
  • 450g sultanas
  • 225g raisins
  • 450g glacé cherries
  • Grated zest of 2 oranges
  • 300ml sherry (I used Harvey’s Bristol Cream)
  • 350g butter, softened
  • 350g dark brown sugar
  • 6 eggs
  • 100g self-raising flour
  • 225 plain flour
  • 100g blanched, chopped almonds
  • 2 tbsp black treacle
  • 2 tsp ground mixed spice

Method

  • Rinse, dry and quarter the cherries
  • Put all the fruit and orange zest in a container, pour over the sherry and give it a stir
  • Cover with a lid or a couple of layers of tightly sealed clingfilm and leave to soak for 3 days, stirring daily
  • Measure the butter, sugar, eggs, treacle and chopped almonds into a mixing bowl (I used my KitchenAid) and beat well
  • Add the flours and spice and mix thoroughly until blended
  • Stir in the soaked fruit and sherry
  • Spoon the mixture into the prepared tin and level out evenly
  • Bake in the simmering oven for about 9 hours, but keep an eye on it at the 8 hour point. It is done when a warm skewer comes out clean
  • Leave to cool in the tin then turn it out, feed it (see below) and wrap it. I like using parchment lined foil for this (from Lakeland)

Feeding

On a weekly basis from now on you are going to need to feed your cake: take a darning needle and pierce the cake all over, top and bottom; drizzle over a couple of teaspoons of sherry, let it sink in and then turn the cake over and do the same on the other side. Then wrap the cake and place it inside a (large!) airtight container.

Icing

About a week before Christmas I ice my cake with marzipan. I usually buy it but have been known to make my own; homemade is definitely better but sometimes I go for the quicker option. Once the almond icing has dried out, after a few days, I place the final layer of icing on my cake; invariably on Christmas Eve. For this I use ready-to-roll fondant icing. I do not make my own.

My husband took photos and I added captions to some to indicate the different stages.

And finally the finished cake, which we first sliced into on 28 December:


Norwegian Apple Cake

Norwegian Apple Cake


In this post a year ago I mentioned my Norwegian grandmother’s apple cake. It has become a Hardy family tradition to have it on Christmas Eve, but that doesn’t stop us having it at other times of the year. I have vivid memories of evening coffee time at my grandparents’ house in Oslo when cake would often be served.

I made the Norwegian apple cake this weekend for second son’s birthday. It’s not a typical birthday cake but I don’t think that matters. We managed to get his brothers to come along and gathered in London for tea and cake which we consumed while watching the England v Wales Six Nations rugby match. img_6492

I don’t think my grandmother, who is no longer with us, would mind if I gave you the recipe.  It’s extremely easy to make. You can keep it just as it is, or add cinnamon to the apples or sprinkle some flaked almonds over it, or both.

Norwegian Apple Cake

You will need a 20cm/8″ springform cake tin, greased and base-lined with greaseproof paper or bake-o-glide.

Conventional oven: pre-heat to 160º-170ºC

Ingredients

  • 4 Bramley apples
  • 125g plus 1 tbsp caster sugar
  • 125g butter, softened
  • 240g self-raising flour
  • 1 large egg

Method

  • Peel, core and slice the apples and place the slices in a bowl with the juice of a lemon to stop them going brown. Add the tablespoon of sugar
  • Place the apples in a saucepan with a little water, let’s say 3mm deep. Cook them for a minutes on the Aga simmering plate or your hob, giving them the occasional stir with a wooden spoon. When they’re all soft, remove from the heat and leave to cool
  • Make your cake batter by placing the sugar, butter, flour and egg in a bowl and beating the mixture. I use my electric mixer
  • Press two thirds of this mixture into the base of your prepared tinimg_4305
  • Then spoon the stewed apples over this but not right up to the edge. If you feel you have too much apple mixture (after all, Bramleys vary in size) save some (freeze it if necessary) to have with roast pork at a later date
  • On a floured surface very gently roll out the remaining third of the batter and then cut it into strips about 1.5cms wide
  • Arrange these strips in a lattice pattern over your cake. You don’t have to make a complicated over and under pattern. The dough is very soft and the strips might break as you pick them up. img_4306
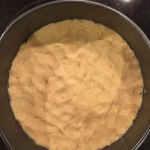
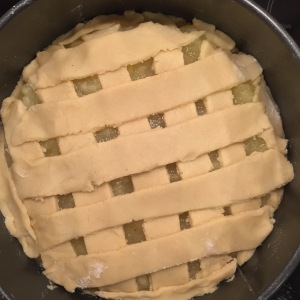
Don’t worry: you can just patch them together as you place them. As you can see from the photos, mine does not look remotely professional
  • Bake your cake until golden brown. You can’t test it because of the apples.  I find it usually takes between 35 and 45 minutes.  I start checking it at about 25.
  • You can serve it warm (but not piping hot) or at room temperature, dusted with icing sugar and cinnamon. I’m not a cream person but this cake really is best served with a dollop of lightly whipped cream.img_4319

Another Day, Another Apple Cake


img_3827


I hope it’s still correct to say apples are in season, because it’s already a couple of weeks since I made this apple cake with autumn in mind and only now am I getting round to writing about it.  On the other hand, it’s not exactly a seasonal cake because we all cook with apples throughout the year and to make this cake I bought Bramley apples from the supermarket.

Regular readers will remember that I like making apple cakes and prefer them to pies and crumbles, partly because they work both as puddings (with whipped cream, say) and as teatime cakes.

You can’t have two many apple cake recipes in your repertoire, in my view, and I’m happy to add this Delia recipe to mine.  The lazy baker in me particularly appreciated the fact that peeling the Bramleys is optional.  That was a no brainer: I didn’t peel them.

To make the job even simpler I used the all-in-one method to mix all the ingredients together before folding in the apples and orange zest.

Ingredients

  • 225g self-raising flour
  • 1 rounded teaspoon baking powder
  • 1 tsp mixed spice
  • 1/2 tsp cinnamon
  • 3 Bramley apples
  • 175g soft light brown sugar
  • 2 large eggs
  • 75g butter, softened
  • Grated zest of an orange
  • 1 tbsp milk (if needed)
  • A little icing sugar

Method

  • Conventional oven: pre-heat to 180ºC
  • Grease and base-line a 20cm loose bottomed cake tin
  • Sift the flour, baking powder and spices into your mixing bowl and add the butter, sugar and eggs
  • Beat until thoroughly blended.  I used my KitchenAid.  You could use an electric hand whisk
  • Chop the apples into small dice (with or without peel, remember) and fold into the mixture with the orange zest.  Add a little milk if the mixture seems dry
  • Spoon the mixture into your prepared tin
  • Bake in the baking oven of your Aga (or in the centre of a conventional oven at 180ºC) for about 1 hour, but do check on it every 10 minutes or so after the first half hour.  I put a piece of greaseproof paper loosely on top at this point because my cake was looking a little dark
  • The cake is done when it feels springy to touch and is starting to shrink away from the sides of the tin
  • Cool in the tin for 10 minutes or so before turning out onto a rack
  • Sprinkle with icing sugar to serve


Glazed Lemon Cake


IMG_1268

The cake

Parliament has gone into recess, a new Prime Minister is in place and the schools have broken up, so it’s probably not too soon to say that the political scene will calm down a little following the tumultuous four weeks since the EU Referendum result.  For this news junkie it will mean more time for neglected chores but more importantly, even though we’re not going away on holiday this year, for doing nice things with friends and family.

And now is when it starts.  It’s the time of year again when I make a birthday cake for my eldest son, who is 29 today, which is hard to believe.  For the last three years he’s shared his birthday with Prince George.  Two of his brothers and I celebrated his 26th birthday over lunch in a Cambridge restaurant and I recall that they were irritated with me because I kept glancing at my phone to see if there were any news alerts about the royal baby.  It had been announced earlier that morning that the Duchess of Cambridge had gone into labour.

I can’t remember if I made a birthday cake on that occasion, but I like to bake one for all my boys’ birthdays if it’s practical.  The eldest was on an expedition in Ecuador for his seventeenth birthday and there’s a great photo of him waking up in his sleeping bag to be presented by his friends with a cupcake bearing a single candle.  He lives in Cambridge and a couple of years ago, because we weren’t going to manage to meet up around the big day, I ordered him two cakes from that great Cambridge institution, Fitzbillies.  (If you ever visit, you have to try their Chelsea Buns.)  I couldn’t decide between the chocolate and the carrot so bought both (in the smallest size).  Extravagant, but I knew he’d be sharing them with friends.

When he was small I wasn’t really into baking and anyway, was working full-time and didn’t feel I had much time in my life for it.  But I did usually manage to make some sort of sponge cake and get my husband, who is more creative than me, to cut it up and shape it into whatever the boy was into that particular year, ready for me to slather it in buttercream.  For example, we made a train when he was two and a football pitch when he was five.

This year, not for the first time, I’ve made his favourite Glazed Lemon Cake from the Silver Palate Cookbook.  It’s not particularly quick to make, what with seven lemons to zest and a lengthy icing process, but worth it for an occasion and one cake goes a long way and keeps well in an airtight container.

We are all meeting up in London this weekend to celebrate the birthday.  I will be travelling up alone on the train and have to work out a way to get the cake there without damaging it.  I know it freezes well so I’ve decided to freeze it and let it gradually thaw during the journey.  That way it will be very fresh by teatime and also not too squishy while in transit.

Glazed Lemon Cake

You will need a bundt tin, greased, or a tube tin, as it’s called in The Silver Palate Cookbook, which is American.

Conventional oven: pre-heat to 160ºC

You want the lemon zest to be very finely grated.  I find a Microplane grater is best for this.

Ingredients

  • 7 lemons (you’ll need all the zest but the juice of only 3 or 4)
  • 225g unsalted butter
  • 400g granulated sugar
  • 3 eggs
  • 375g plain flour
  • 1/2 tsp baking powder
  • 1/2 tsp salt
  • 284ml buttermilk
  • 2 tightly packed tbsps grated lemon zest
  • 2 tbsps fresh lemon juice
  • Lemon icing: see below

Method

  • Cream butter and sugar until light and fluffy. Beat in the eggs, one at a time, blending well after each addition
  • Sift together flour, baking powder and salt. Stir dry ingredients into egg mixture alternately with buttermilk, beginning and ending with dry ingredients. Add lemon zest and juice
  • in Full disclosure: as you know, I’m a fan of the all-in-one method and it works for this cake too. Mix thoroughly all the ingredients except the zest and juice and fold these in at the end
  • Pour batter into the prepared tin. Set on the middle rack of a pre-heated conventional oven or on the rack on the bottom rung in the Aga baking oven. Bake for 1 hour 5 minutes (conventional) or slightly less time in the Aga
  • For Aga baking I check the cake after 30 minutes and turn it, and then check it every 10 minutes to make sure the top isn’t burnt. It shouldn’t take more than 1 hour in total. It’s done when a skewer comes out clean

Lemon Icing

  • 450g icing sugar
  • 113g unsalted butter, softened
  • 3 tightly packed tbsps grated lemon zest
  • Juice of about 2 lemons
  • Place the sugar, butter and about half the juice in a mixing bowl and gradually blend them using a handheld mixer. When smooth, mix in the remaining juice and zest. Note: this icing is a lot runnier than buttercream icing.
  • When the cake has been out of the oven for about 10 minutes, gently pierce it all over using the narrow end of a chopstick. Spoon over about a third of the icing and allow it to sink in for about 5 minutes before turning out the cake onto a cooling rack
  • Pierce the other side of the cake all over and begin spooning over the remaining icing. It will slide down the sides and end up on your board/work surface but you just have to keep scooping it up and pouring it over the top again. This is the boring, lengthy bit: it could take half an hour until the icing has stopped sliding off the cake and  has mostly sunk into it. See slide show below:


This slideshow requires JavaScript.

Sticky Almond Cake

IMG_3164

It is said that marzipan is a bit like Marmite in that you either love it or hate it. I absolutely adore it and hence this cake, which comprises a thick layer of the stuff in the middle. This is the reason for the “sticky” in the title. Cakes made with ground almonds tend to be deliciously moist anyway, but the addition of marzipan takes it to a whole new level. I made this cake for my book club last week and received compliments and requests for the recipe. Even my husband, who normally doesn’t like marzipan, loved it.

This cake can also be seen as relief from the relentless EU referendum debate. At last the day has finally arrived and all we can do is cast our votes and wait for the result. In a conversation with a Twitter mate, the other day, we bemoaned how nasty conversations had become, with people who normally share similar political outlooks finding themselves on opposite sides. She and I decided we’d change the subject and discuss recipes instead, and that is how I’ve come to be writing about this cake. So, @soyoprincess, this is for you.

Sticky Almond Cake

Ingredients

  • 225g butter
  • 225g caster sugar
  • 4 large eggs
  • 50g plain flour
  • 150g ground almonds
  • 350g marzipan (white, preferably)

Method

  • Grease and base-line (with bake-o-glide or parchment) a 23cm springform cake tin
  • Place the butter, sugar, eggs, flour and ground almonds in a bowl and beat until thoroughly mixed.  I did this in my KitchenAid mixer but an electric hand whisk will also do the job
  • Roll out the marzipan to the size of your cake tin and using the tin as template, cut in a circle
  • Place half the mixture in the tin and top with the marzipan, then cover with the remaining mixture
  • Bake in the baking oven, or conventional at 180ºC. Start to check it at 45 minutes and cover with foil or parchment if necessary. It’s ready when it’s firm to touch. Sorry to be vague but this can take an hour or as long as an hour and a quarter
  • Cool in the tin for 5 minutes and then remove to a rack
  • Dust with icing sugar before serving
  • This cake keeps for several days; in fact, it improves with age


Tarts and Scones

IMG_2778

Making tarts or quiches in an Aga could not be easier because you do not have to bake the pastry blind.  Take the tart above, which I made on Friday.  I used this recipe by Diana Henry but was able to omit several stages and go straight from chilling the lined tart tin to adding the filling and baking it.

On this occasion I didn’t even make the pastry myself.  I bought some good quality all butter shortcrust in sheets, which meant minimal rolling out was required.  Once I’d lined my tin with it, I put it in the freezer to firm up, as Diana advises, but I did not prick the pastry with a fork; this is not necessary if you are not baking it blind.

I’m not sure how long mine was in the freezer for, but probably no longer than half an hour.  I did a bit of washing up (I’m one of those cooks who clears up as she goes along) and prepared the filling while this was happening.  So then all I had to do was put the crab/salmon/Thai ingredients in the pastry case and pour over the cream/egg mixture and cook my tart.  This I did by placing it straight onto the floor of the Aga roasting oven and leaving it there for about thirty-five minutes.  I checked on it after twenty though.  It was done when the filling was golden and no longer wobbly.  I removed it and let it rest while I roasted some new season English asparagus to go with it.  A nice green salad would have been a good accompaniment too.  We thought this tart was delicious.  I have resolved to make more such things during the summer.  A tart makes excellent picnic food and if you have any left over, it keeps well in the fridge and is available for any peckish moments.  I’ve just remembered a rather delicious smoked salmon one I used to make.  Must dig out the recipe.

On Saturday I did absolutely no cooking, which was a treat.  We were in London for the day and went out for a lovely family lunch at our favourite Italian restaurant, fittingly called La Famiglia.  The reason for the gathering was that one of my cousins had come over from Norway to visit his aunt, my mother.  All my boys were able to join us and together with one girlfriend and one fiancée there were ten of us round the table.  My husband, youngest son and I didn’t get back to Bristol until about 8.30 in the evening (in time to catch most of Eurovision).  We weren’t really hungry but managed to squeeze in a little slice of the tart all the same.

On Sunday afternoon I made scones for afternoon tea.  I cannot think of anything quicker to bake than scones and I just love them.  The recipe I chose was this one by Thane Prince which uses buttermilk.  The scones are light and not at all rich.  If you want a richer scone, there are plenty of recipes which use eggs, like this Mary Berry one.

Update: BBC Food Website

Following the devastating news today that the BBC is to remove all 11,000 recipes from its food website, I need to update this post.  The Mary Berry scone recipe link above will soon no longer function.  It was probably a bit lazy of me merely to give you a link anyway, so I’m giving you below one of her scone recipes in full.  It’s one I’ve used many times.  And don’t worry, I have no plans to remove any recipes from my blog so it will be here for you to use forever!

Mary Berry’s Very Best Scones

  • Makes about 20
  • Pre-heat conventional oven to 220ºC
  • You will need two large baking trays, lightly greased or lined with bake-o-glide

Ingredients

  • 450g SR flour
  • 2 rounded teaspoons baking powder
  • 75g butter, at room temperature
  • 50g caster sugar
  • 2 large eggs
  • about 225 ml milk

Method

  • Sieve the flour and baking powder into a large bowl and rub the butter into it with your fingertips, until it resembles fine breadcrumbs.  You can pulse this in a food processor if you prefer
  • Stir in the sugar (and pulse again if using food processor)
  • Beat the eggs together and make up to a generous 300ml with the milk, then reserve 2 tablespoons of this for glazing the scones later
  • Gradually add the egg mixture to the dry ingredients, stirring it in until you have a soft dough.  Again, this can be done in a processor
  • The mixture should be on the wet side, sticking to your fingers, as the scones will rise better
  • Tip the dough onto a lightly floured surface and flatten it out with your hand to a thickness of 1-2 cms.  Use a 5cm fluted cutter to stamp out the scones by pushing the cutter straight down into the dough (as opposed to twisting it), then lifting it straight out
  • Gently push the remaining dough together, knead very lightly, then re-flatten (you could use a rolling pin) and cut out more scones
  • Arrange the scones on the baking trays and brush the tops with the reserved beaten egg mixture to glaze
  • Bake, one tray at a time, with the tray on the third rung in the Aga roasting oven, or in the pre-heated conventional oven, for 10-15 minutes, until well risen and golden
  • Transfer to a wire rack and leave to cool


Waffles


When I was young we used to go to Norway for the summer holidays every other year.  My brother and I would go with our mother for about six weeks and my father would join us for two or three weeks.  We’d stay mainly with my grandparents in Oslo but would also visit my aunt and cousins in Kristiansand on the south coast and my uncle and cousins in Stavanger on the west coast.

Norway was, and still is, an idyllic place to be on holiday if you love being outdoors and don’t like hot, sweaty crowded beaches or crowds full stop.  It is relatively unspoilt with some of the world’s most stunning landscapes.  Not that I’m biased or anything.  Many Norwegians have a holiday home, or “summer house”, either in the mountains, by the sea or on one of the thousands of tiny islands dotted along the coastline, where they spend a lot of time during June and July when the days are long and it barely gets dark at night.  We would spend our days fishing, messing about in boats, or clambering over rocks looking for shrimps and crab.  Even in Oslo, the capital city, peaceful lakes and forests are but a short tram ride away.  As a child growing up in Oslo my mother used to ski to school.  During the long, cold winters it was the easiest way to get around.

So often one’s memories of childhood holidays are evoked by the food one ate and this is very true of our Norwegian stays.  There were the shrimps bought straight from the boat as it arrived back at the harbour in the early morning; the freshest ever mackerel, gutted, filleted and painstakinglingly de-boned by my grandmother or aunt and fried in butter until the skin was golden and crisp; juice made from homegrown blackcurrants, raspberries and redcurrants; the most divine homemade strawberry jam, more runny and less sweet than any you’d buy in a shop and all the better for it; tiny home-baked bread rolls which accompanied every picnic we went on, and there were a lot of picnics.  And then there were the waffles which would be served every time we were invited to friends or relatives for tea or coffee.  At least, that’s how I remember it!

I suspect there isn’t a Norwegian household without a waffle iron.  I remember my mother buying her electric one in Norway because you couldn’t get them here at the time, but the other day in my local shop, Kitchens, I noticed several on display so times have obviously changed.  You will see from my photos that my waffle iron, which my mother gave me years ago, is no longer pristine, but it works well.

As a Bank Holiday treat I made waffles for breakfast this week and I thought you might like the recipe.  Cardamom is the key ingredient I think but it’s a small amount and the flavour is subtle; strangely enough, I don’t remember noticing cardamom in the waffles I ate as a child.

Ingredients

  • 3 eggs
  • 110g caster sugar
  • 250ml whipping or double cream
  • 500ml milk
  • 1/2 tsp cardamom, ground
  • 1 tsp baking powder
  • 400g plain flour

Method

  • Beat the eggs and sugar together.
  • Sieve the flour with the baking powder and cardamom
  • Using an electric hand whisk or mixer, add the flour mixture and milk/cream to the egg alternately to make a thick batter
  • Ladle into the waffle iron and cook
  • Serve with jam and/or butter or clotted cream, but they are also delicious plain


Orange and Poppy Seed Cake

IMG_1522

For some reason I haven’t done any baking for a while. It might be because there have only been three of us to feed most of the time but that’s not usually sufficient reason. If I don’t want a cake to go stale before we’ve finished it, I bake a small one or perhaps some cookies, scones, muffins or individual cakes like these rock cakes, so I can put some in the freezer.

My son and his fiancée have just moved into their first flat together. They don’t own it of course – what young couple can afford a mortgage nowadays? – but they’re very happy and excited and it’s made me very happy on their behalf. It’s also reminded me of what it was like when my husband and I started out. They have very little so I’ve gone through some of my cupboards, digging out glasses, crockery and other items we no longer use and my husband found them a very nice pine table in our garage. They only have one bedroom so they sensibly bought a sofa bed for the living room. This has still not been delivered (a frustrating tale which my Twitter followers might be aware of) but it will arrive next week and their little home will be more or less complete.

Anyway, I digress. Perhaps it was all the vicarious home-making activity that led me to bake a cake today. I opted for a recipe for an orange and poppy seed cake recipe from the Nordic Bakery Cookbook. I don’t think I’d ever made a cake with poppy seeds before but at a café in Bristol recently, youngest son raved about the lemon and poppy seed cake so I thought he might be pleased to find something similar waiting for him on his return from school this afternoon. I was right. We both love the cake and have decided that simple Nordic cakes like this are our favourites: no icing or decoration of any kind; just wholesome and declicious.

Here’s the recipe, which I tweaked a little. I don’t like an overpowering vanilla flavour (a legacy from being forced to eat lumpy custard at school in the cruel 1960s) so I used 2 teaspoons here instead of 3. I also used the all-in-one method to mix the batter. I find it works for most cakes, and is much quicker, obviously.

Orange and Poppy Seed Cake

You will need a 20cm/8inch round cake tin, greased

Ingredients

  • 300g unsalted butter, at room temperature
  • 250g caster sugar
  • 2 teaspoons vanilla extract
  • 5 eggs
  • 3 tsps baking powder
  • 300g plain flour
  • Grated zest of 1 1/2 oranges
  • Freshly squeezed juice of 1/2 orange
  • 1 tbsp poppy seeds

Method

  • (Heat conventional oven to 180ºc)
  • Beat together the butter, sugar, eggs, flour, baking powder and vanilla in a mixer (I used my KitchenAid) or using an electric hand whisk
  • When the mixture is light and fluffy, fold in the orange zest, juice and poppy seeds until well mixed
  • Spoon the mixture into the prepared tin and level the top with the back of the spoon
  • The cake is done when a skewer inserted in the centre comes out clean
  • You may want to put a piece of greaseproof paper over the cake at some point. I did this at 40 minutes because the top of the cake was looking rather dark
  • I baked this in the Aga baking oven for 65 minutes and it was perfect. The original recipe recommends a bake of 50-60 minutes in a conventional oven

Wheat Intolerance and Spelt Flour

Now I’m as sceptical as the next person about the so-called food intolerances and allergies of the modern world, but there’s no doubt about it, many people report feeling unwell or at best uncomfortable if they eat foods containing wheat, and prefer to steer clear of them. A friend staying recently is one such person. She isn’t coeliac so gluten’s fine, but she has discovered over the years that she’s less likely to have stomach aches and feel generally unwell if she doesn’t eat bread, pasta and cakes. Unless, that is, they are made using spelt flour. Spelt is an ancient grain with a unique gluten structure which makes it easier to digest; at least, that’s what it says on my packet. I made the orange and poppy seed cake when she came, but this time substituted spelt flour for plain flour. And, guess what, it turned out the same! Okay, so maybe it was just a tiny bit denser, but it’s possible that, being so determined to find something different about it, I completely imagined this.

Lemon and Poppy Seed Cake

When I substituted lemon for orange in the cake I was very pleased with the result. It was a good way to use up some of the lemons left over from making my son’s birthday cake. I added the juice of two lemons and the zest of one, which produced a subtle lemon flavour. If you wanted a stronger flavour, you could add the zest of a further lemon.